From FireBase to Freedom
Do not build your own CMS
Remember my first post, where I warned about the pitfalls of building your own CMS? Creating one from scratch felt empowering, but the lesson I took away was simple: more often than not, it’s more trouble than it’s worth. If your goal is to create posts without headaches, stick to the KISS principle (Keep It Simple, Stupid).
So, I did a 180 and rebuilt almost everything. Instead of relying on Firestore Database and Storage, I streamlined my setup by using SvelteKit’s built-in features to manage content and routing.
And in case you’re wondering about the title
I still use Firebase for hosting, but calling it “Mostly Firebase-Free” just didn’t have the same ring!
So if you’re thinking of building your own CMS, remember: sometimes, simpler really is better
Why SvelteKit?
SvelteKit takes the core of Svelte to a whole new level, adding features that make building fast, SEO-friendly websites a breeze. Here’s why it stood out to me:
SEO and Performance
SvelteKit provides server-side rendering (SSR) and static site generation (SSG) out of the box, which means it can serve pages optimized for SEO and load quickly, improving user experience and discoverability.
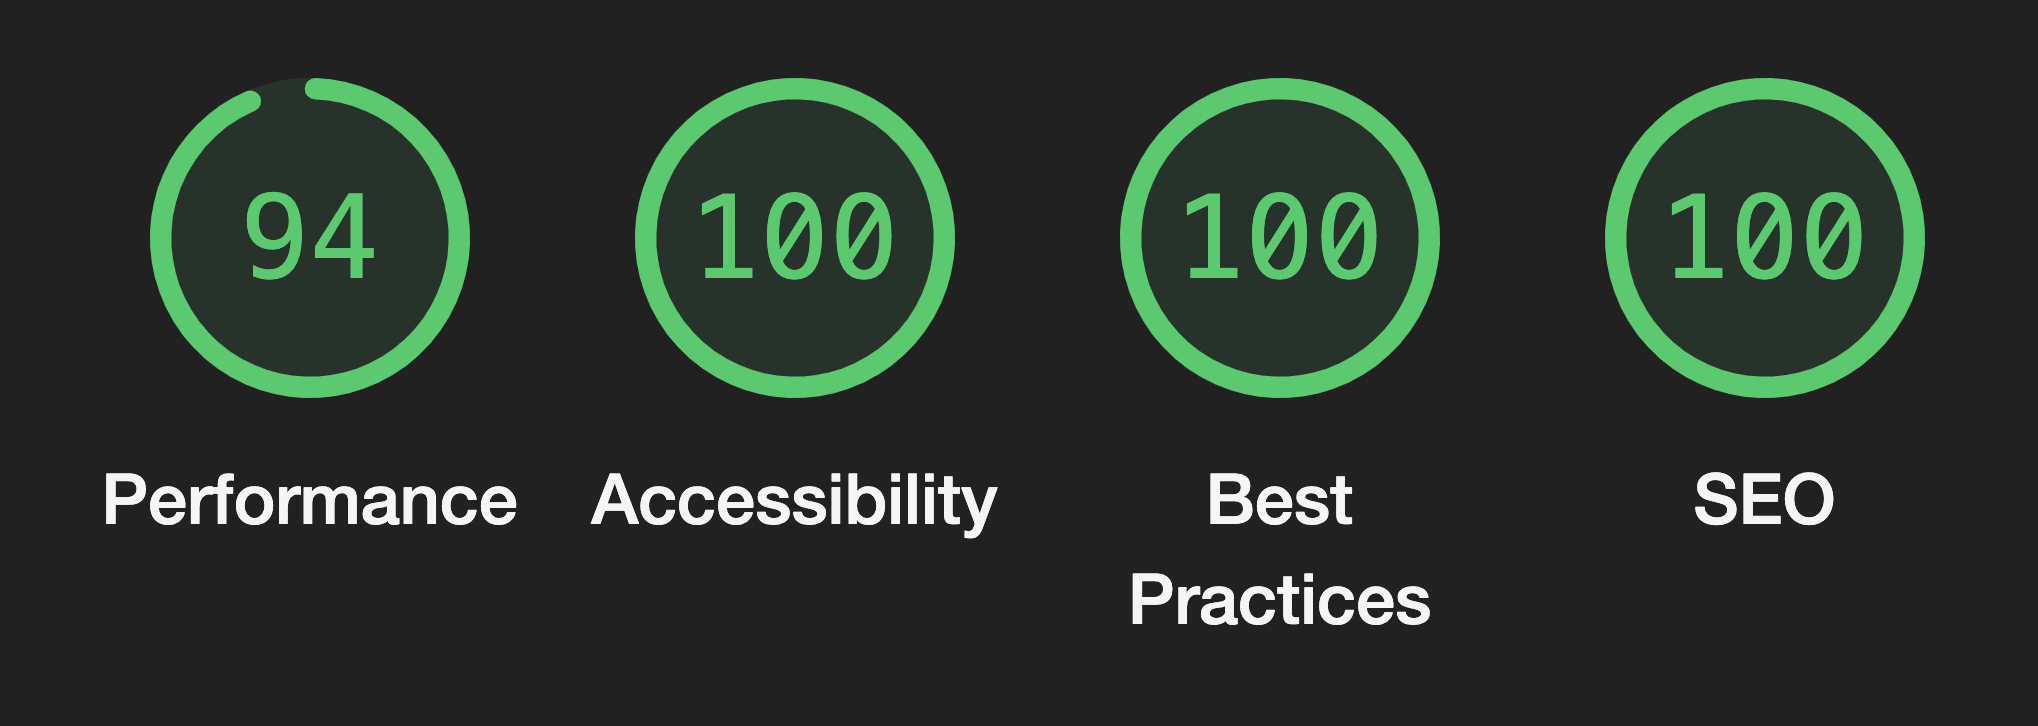
Just look at this:
 Image 1: Lighthouse diagnostics report.
Although I don’t have a screenshot from before, let’s just say that “green” was an unfamiliar color in my previous Lighthouse reports. Those last 6% in the performance metric? Getting there could easily be a blog post of its own!
Routing
SvelteKit’s file-based routing makes defining routes simple and intuitive—just structure your
folders in src/routes, and your routes are ready to go.
This approach saves time, reduces setup complexity, and enhances the developer experience.
Here’s a quick breakdown of SvelteKit’s routing features:
Here’s a breakdown of how SvelteKit’s routing works:
- File-Based Routing: Every
+page.sveltefile in thesrc/routesdirectory becomes a route automatically. For example, a file atsrc/routes/blog/+page.sveltemaps to/blog, whilesrc/routes/about/+page.sveltemaps to/about. - Dynamic Routes: Dynamic parameters are defined with square brackets.
For instance,
src/routes/blog/[slug]/+page.sveltecreates routes like/blog/my-first-post, where slug captures the valuemy-first-post. - Routes with Layouts:
+layout.sveltefiles define shared layouts for all nested routes within a folder (e.g. src/routes/blog/+layout.svelte for /blog routes). - Data Loading:
+page.tsand+layout.tsare used for client-side data loading, while+page.server.tsand+layout.server.tshandle server-only data (e.g. database data or private environment variables).
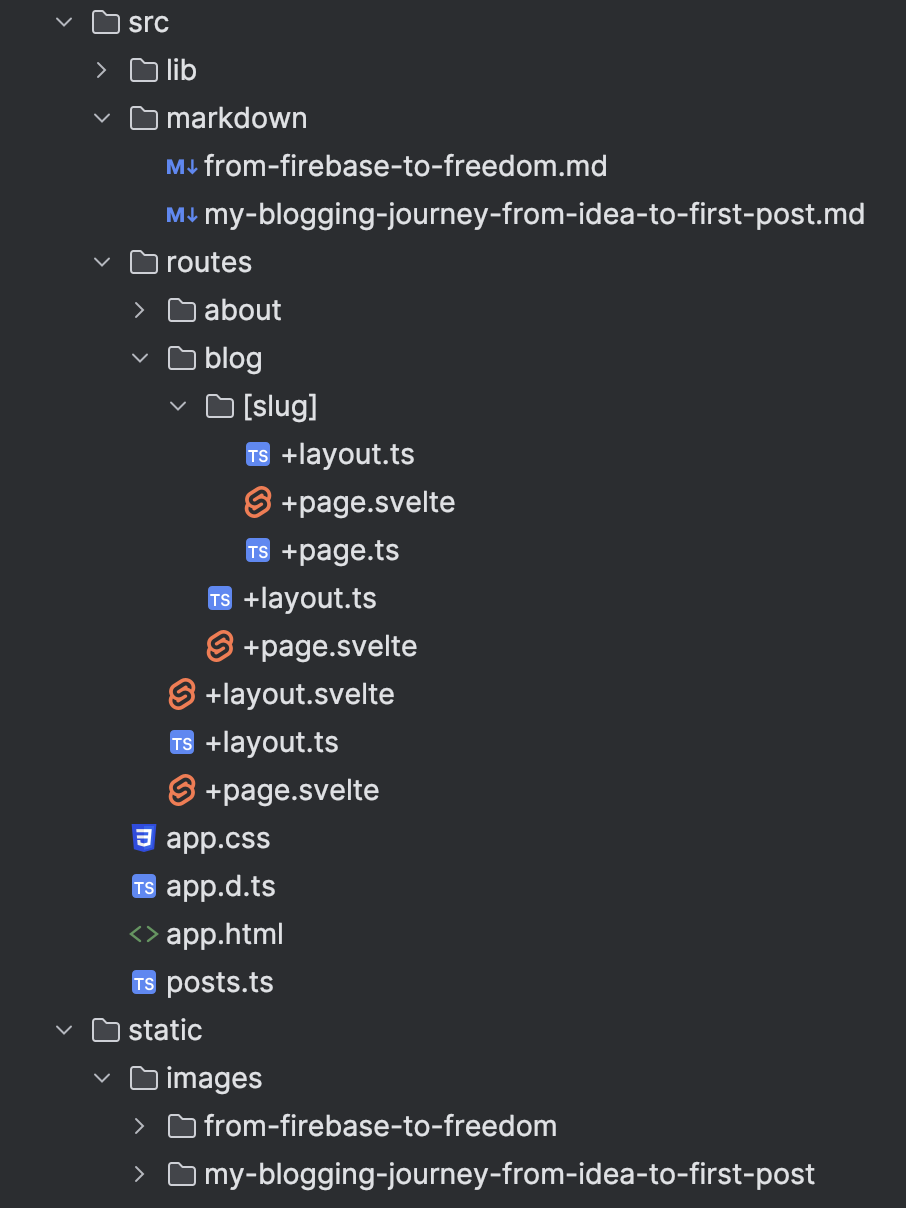
Here’s the new project structure that reflects this approach:
 Image 2: Blog’s project structure.
If you’re starting a static blog with SvelteKit, you’ll see this structure everywhere—even in Svelte’s official routing documentation.
Storing Markdown in Source Code
I chose to store all my markdown content, which includes blog posts and assets, directly in my source code. This approach lets me sidestep potential headaches with admin panels, SEO configurations, authentication, storage management, and asynchronous calls.
Without a database, I’ve set up a static TypeScript file (Posts.ts) to manage all post metadata:
export const posts: PostPreview[] = [
  {
    title: "My Blogging Journey: From Idea to First Post",
    slug: "my-blogging-journey-from-idea-to-first-post",
    preview: "A personal journey of building a custom blog CMS, tackling challenges and learning along the way. Using Svelte for front-end and Firebase for backend.",
    createdAt: new Date("Oct 23 2024 17:34:19 GMT+0200"),
    concept: false,
    tags: [Tag.DEVELOPMENT, Tag.SVELTE, Tag.FIREBASE],
  },
  {
    title: "From FireBase to Freedom",
    slug: "from-firebase-to-freedom",
    preview: "Moving from Firebase to SvelteKit gave me the freedom to optimize SEO, simplify content management, and streamline my blog. Here’s why I made the switch and how it transformed my site.",
    createdAt: new Date("Nov 6 2024 11:00:00 GMT+0200"),
    concept: true,
    tags: [Tag.DEVELOPMENT, Tag.SVELTE_KIT, Tag.FIREBASE],
  }
];
Codeblock 1: Posts.ts holding post metadata.
The markdown files are stored in the /markdown folder (see Image 2 above), with filenames matching
each post’s slug, so I can dynamically retrieve the markdown content when needed.
This approach extends to assets like preview and banner images, making them easy to locate and
update; for example, the banner image for this post is located at
/images/from-firebase-to-freedom/banner.webp.
Additional Benefits
Aside from SSR and SSG, this approach offers a few extra perks:
- Offline Editing: I can write and edit my posts in any editor, even offline.
- Version Control: With everything in source code, all changes are version-controlled, which adds reliability and makes it easy to track content evolution over time.
Drawbacks
Of course, there are some trade-offs to consider:
- Manual Management: Slug creation, date management, and tag selection are manual tasks, which add a bit of extra work but ensure I have full control over content formatting and consistency.
- Asset Handling: Converting, storing, and managing images requires additional steps.
- Static Updates: Since content is bundled with the code, every update requires a new deployment.
Future Plans
The drawbacks I encountered after switching to SvelteKit also present opportunities for future improvements.
As a developer, automating repetitive tasks is essential. Currently, I create slugs from titles manually and set estimated publish dates myself. By integrating these steps into the build process, I could streamline content creation and reduce potential errors.
Another area for improvement is image management. I’ve chosen to use the WebP format, which means I need to convert images before uploading and sometimes even compress them further for web optimization. Automating this conversion and compression could save time and ensure images are always optimized.
Finally, to further simplify my workflow, I plan to set up an automated CI/CD pipeline specifically for content. With this in place, any additions or edits to markdown files would automatically trigger a build and deployment, keeping the site up-to-date with minimal manual effort.

